

In order to set up your hosting, you’ll need a Domain Name (external or internal). Register a domain with Epik, or add your existing domain as external in order to activate your hosting purchase fully.
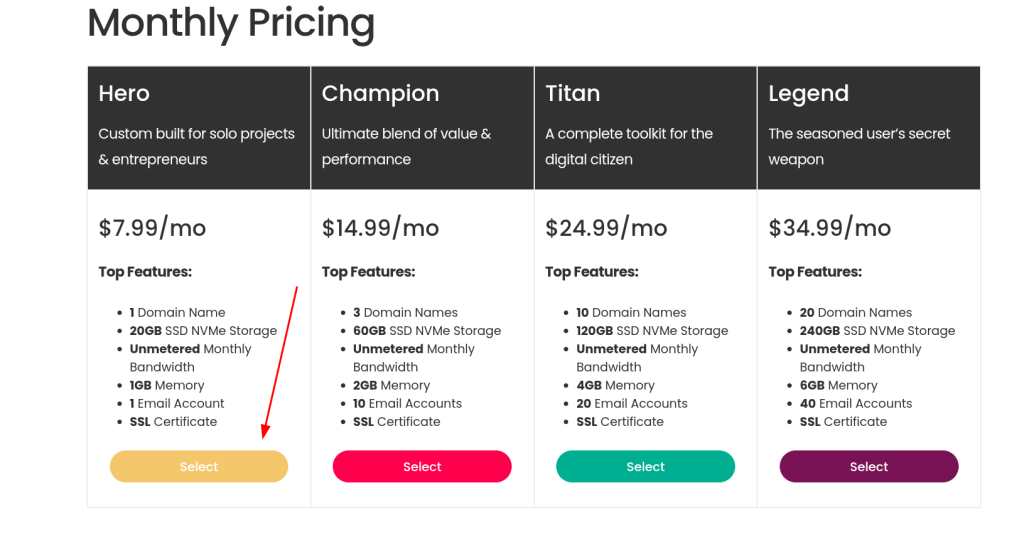
Epik offers a variety of Hosting Plans:
WEB HOSTING PLANS – www.epik.com/web-hosting/
HERO
CHAMPION
TITAN
LEGEND
EMAIL HOSTING PLANS – www.epik.com/web-hosting/email/
STARTER
ADVANCED
EXPERT
- 1. Select the “Hosting Plan” with the needed requirements.
- 2. Click “Select” to add the “hosting plan” to your shopping cart.
- Complete the steps to “check out”.
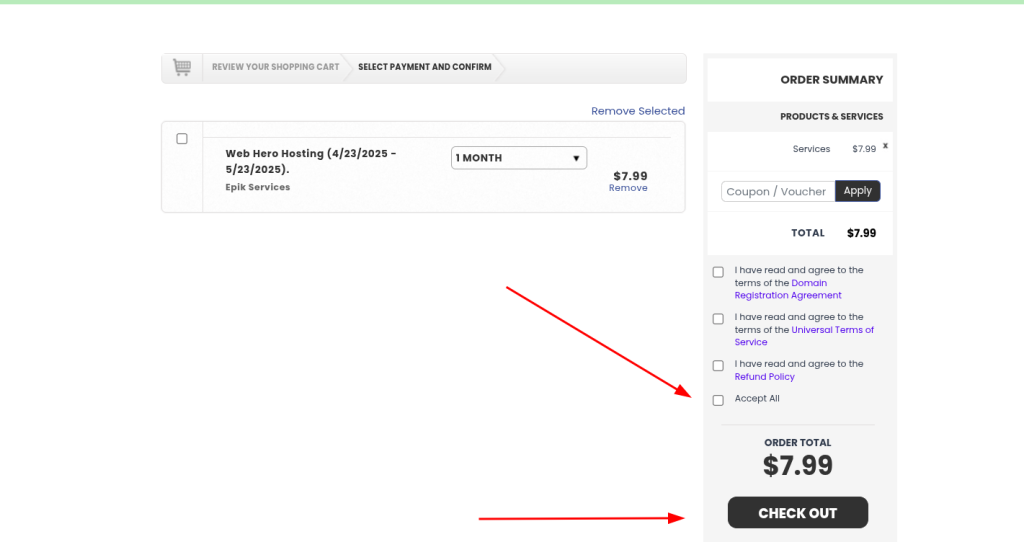
Note: You will need to sign into your Epik account or create one to finish checking out.
- When you’ve completed your purchase, head to your Domain Dashboard, by clicking the drop down arrow next to “My Account“, then clicking “My Domains“.
A notification should appear at the top of the section detailing that you need to link the purchased “hosting plan” with a domain name.
- Click “Resolve Now”, and select a domain to link to your “hosting plan”. After doing so, you’ll receive an email with your hosting details.
Note: If your domain is registered with Epik, the DNS changes such as the Name Servers will be made automatically. Should your domain be registered at another registrar, you’ll need to make sure the domain name resolves to your hosting by changing the domain’s Name Servers.
By now, you should be able to access your cPanel from your Epik account (where you would manage your hosting plan).
Back in your domain dashboard, you should now see the “Hosting”tab. This area shows you the list of domains that have a hosting plan associated with them.
Click the “Hosting” tab.
Right next to each domain, you will see an orange “cPanel” button which will automatically bring you to your cPanel.
Now your hosting plan is fully active and you may start building your website or creating your email account(s)!
To purchase a Hosting Plan within your Epik account, follow these steps below:
1. Sign into your Epik account.
2. Click the “Registrar” tab
3. Click the “three lines” next to the domain name you wish you to purchase hosting for.
4. Click” Build”
5. Click “Order Hosting Package”
6. Select the “Hosting Plan” you desire
7. Click and drag the domain into the platform you wish to purchase (this step will add your desired hosting plan to your shopping cart)
8. Click “Check out Now” and follow the steps to complete your purchase.
Now your hosting plan is fully active and you may start building your website or creating your email account(s)!
Note: If your domain is registered with Epik, the DNS changes such as the Name Servers will be made automatically. Should your domain be registered at another registrar, you’ll need to make sure the domain name resolves to your hosting by changing the domain’s Name Servers. If you have two hosting providers (one for web and one for email), please contact our support team so we can make sure everything is setup correctly!
By now, you should be able to access your cPanel from your Epik account (where you would manage your hosting plan).
Back in your domain dashboard, you should now see the “Hosting” tab. This area shows you the list of domains that have a hosting plan associated with them.”
Click the “Hosting” tab
Right next to each domain, you will see an orange “cPanel” button which will automatically bring you to your cPanel.
Now your hosting plan is fully active and you may start building your website or creating your email account(s)!